

In this post I will detail how to setup at Reverse Proxy using unRAID, SWAG, Cloudflare and a paid domain name.
Why a Reverse Proxy?
Undoubtedly the most secure way of connecting to your LAN over the WAN is to use a VPN however this isn't always the right tool for the job. For example using streaming services such as Plex or Emby, hosting websites, accessing your torrent client, using Guacamole to access your machines etc. It also means you only have to have one or two ports open i.e. 80 & 443. For this guide we'll be using SWAG and Lets Encrypt to generate an SSL wildcard certificate which will cover all our subdomains, also as we're using Cloudflare we only need port 443 open
What will you need?
- Paid domain name (for this guide)
- DDNS service (if your on a dynamic IP)
- Cloudflare free account
- An unRAID system
- SWAG Docker (Secure Web Application Gateway)
- Some services/dockers you want to access.
Domain Name
You'll want to find yourself a paid domain name for this guide. It is possible to use duckdns.org however the process on that is different which isn't covered in this guide. GoDaddy offer very cheap domains along with domain privacy and protection to prevent anyone looking up your name and address. Once you have your new domain its time for the next sage.
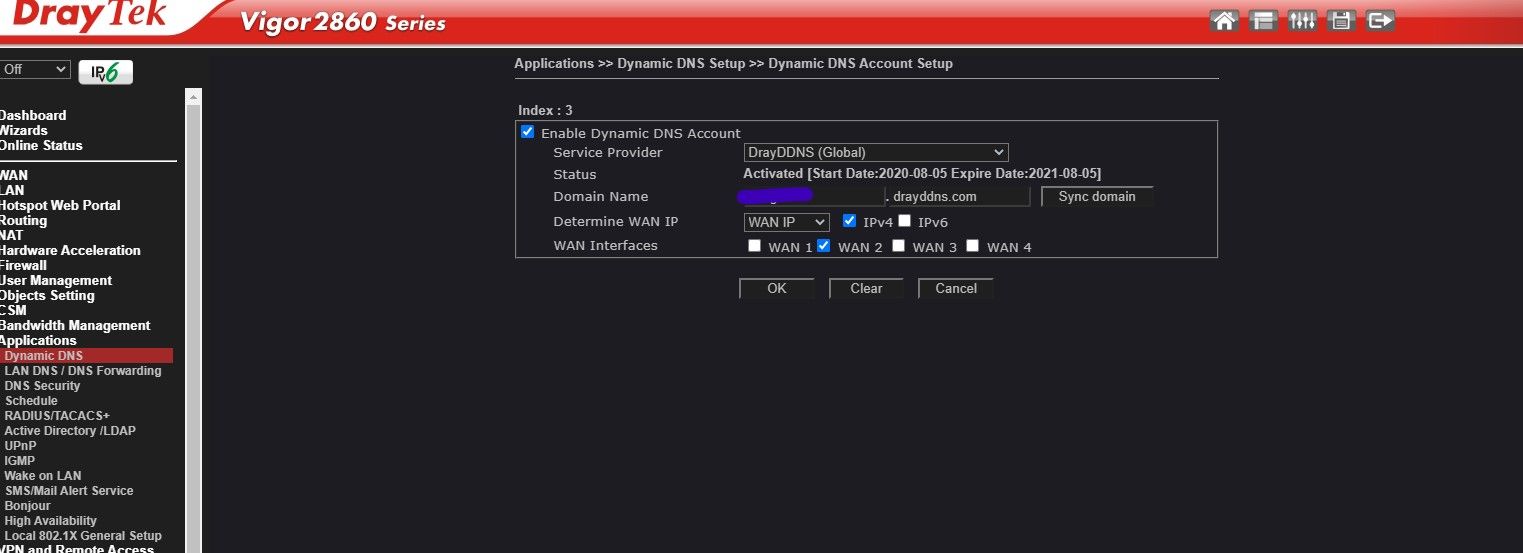
DDNS Service
You'll need this if your on a dynamic IP, if not skip this part. Most routers these days have various DDNS options built in. This is to tell the WAN what your IP is when it changes. Every router is different so you'll have to consult the instruction manual, its an easy process that you should be able to do if your trying to accomplish setting up a reverse proxy.
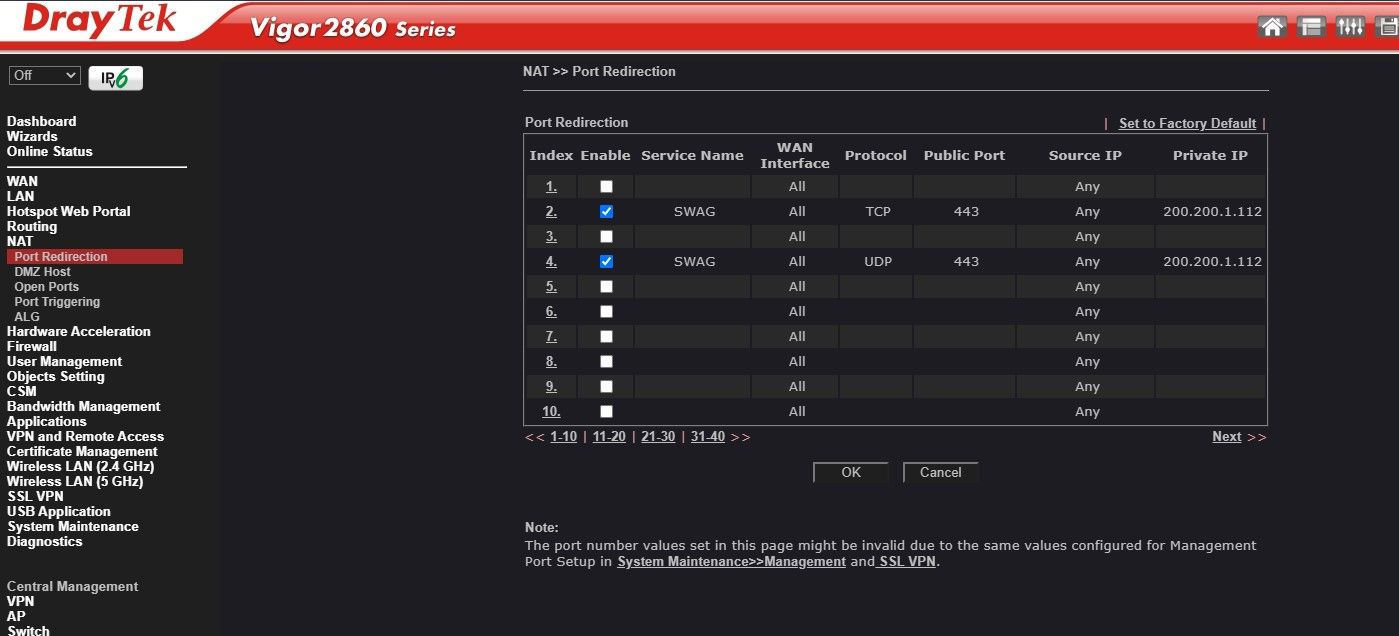
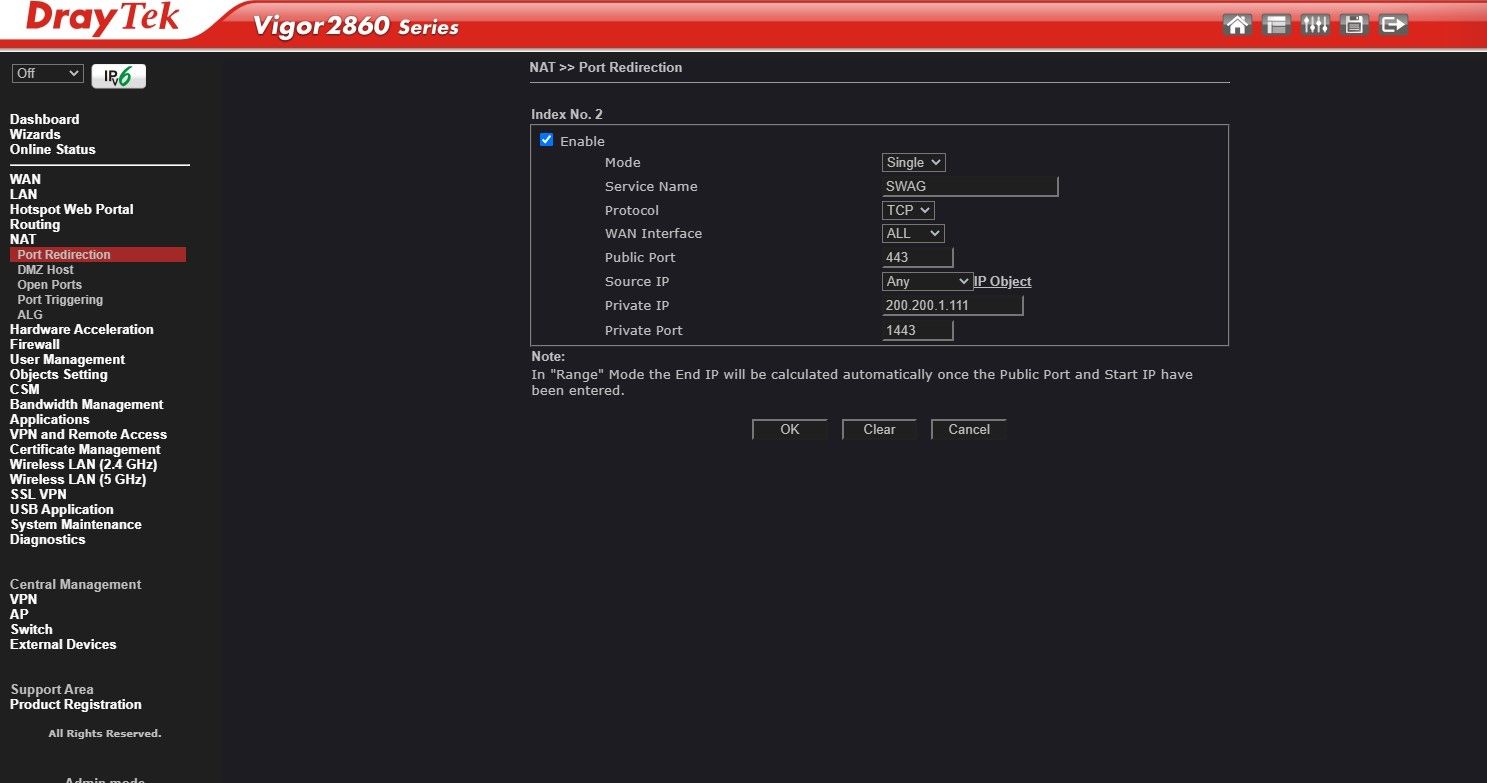
Open ports and port redirection
Now we have to go to your router and open port 443, then point it towards your unRAID system. You'll also have redirect/translate this port to another number as unRAID uses port 443 for itself. If you don't use another port you're opening unRAID up to the internet which is NOT a good idea! Redirect/translate 443 to something like 1443, again every router is different so you'll have to consult the manual.
Cloudflare CDN and why you need it
Cloudflare is a Content Delivery Network which stands as a proxy between your server and the internet. Cloudflare will also stop many of the standard hacks from getting to your proxy, it has built in DDoS protection, it will also function a cache to speed up access to your sites. Another neat function is it'll do analytics for your domain too. Head over to Cloudflare and sign up a free account. Once signed up go ahead and add your new domain.
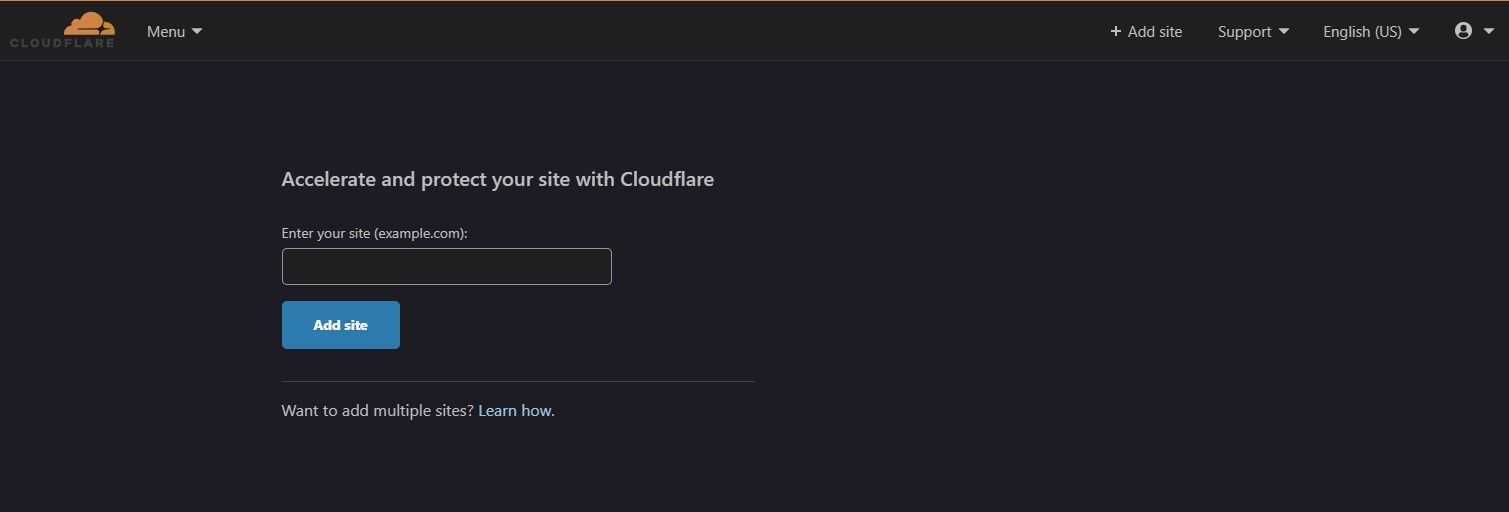
When this is complete you'll be Cloudflare will query your existing DNS settings and import them from the domain registrar. You'll have to copy the Cloudflare nameservers over to the nameservers with the registrar.

Copy these entries and import them into the registrars DNS management tab, in this case GoDaddy.
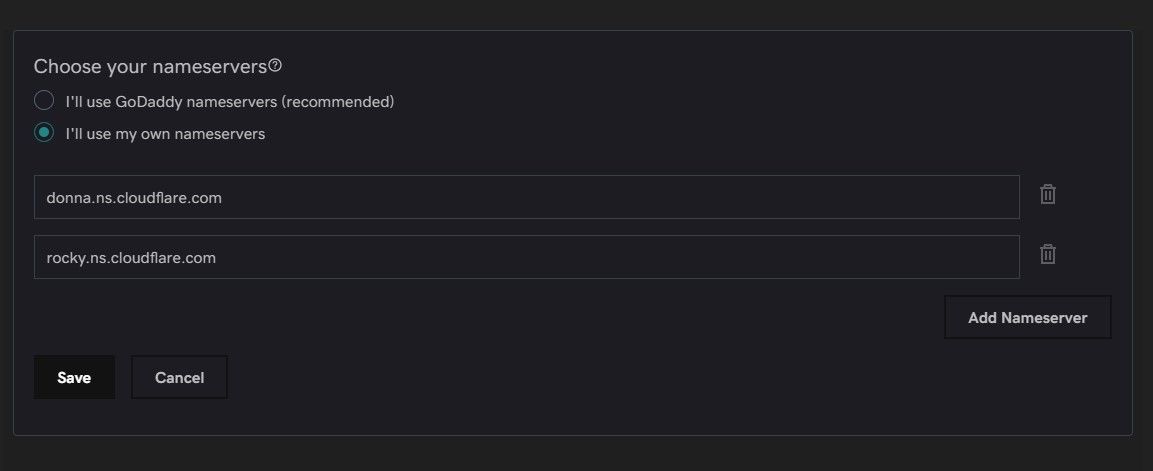
Remember to click save! This part could take a few hours to complete while the servers update themselves but in practice I found it takes only a few minutes. You'll get an email from Cloudflare when everything's ready. While we're waiting write down list of all the subdomains you want to use for your services so for example....
radarr.mydomian.com
sonarr.mydomain.com
guacamole.mydomian.com
You can add to this over time if required but we'll need something to start with. I've got about 20 so far!
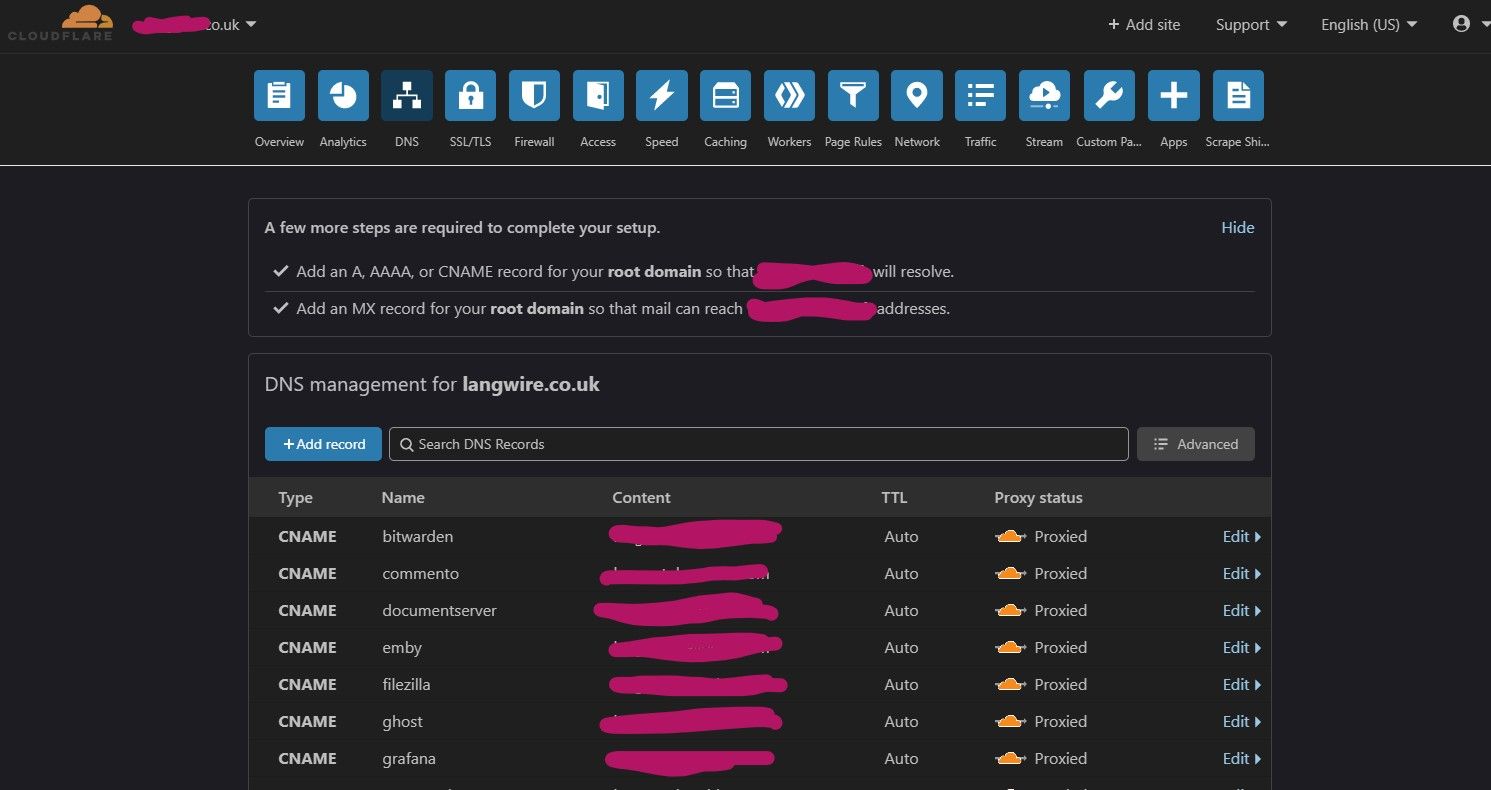
The next step will be to enter all your services/sub domains into Cloudflare. Assuming your on the screen above then...
- Click "Add Record"
- Set type as "CNAME"
- Enter a service into the "Name" field such as radarr.
- Enter your static IP or DDNS address into the "IPv4 address" field.
- Click "Save"
Do this for all your required subdomains. Okay so now we have to get our Cloudflare API and copy it somewhere as we'll need to use it with SWAG. To retrieve your API..
- Go to "My Profile"
2. Click on the "API Tokens" tab
3. Click on "View" for the Global API key.
4. Copy the key somewhere on your desktop for use later.
That's it for Cloudflare for the time being, now on to the next section...
unRAID Docker Create
Now we need to create a custom docker network on unRAID for internal docker DNS resolution.
- Login to unRAIDS UI
- Go to "settings"
- Go to the docker tab
- Toggle dockers to "off"
- Click "Apply"
- Click on "Advanced View" toggle in the top right of the window
- Now toggle "Preserve user defined networks" to "yes"
- Click "Apply"
- Re-enable the docker service
- Click "Apply"
- Now open a terminal window and type...
docker network create dockernet12. Hit the enter key
13. Close the terminal window
SWAG installation
SWAG is the application that makes everything work. It includes NGINX (the web server), Let's Encrypt (for your free SSL certificate, Fail2Ban (for banning rogue IP's, NGINX pre-worked .conf files (for your subdomains).
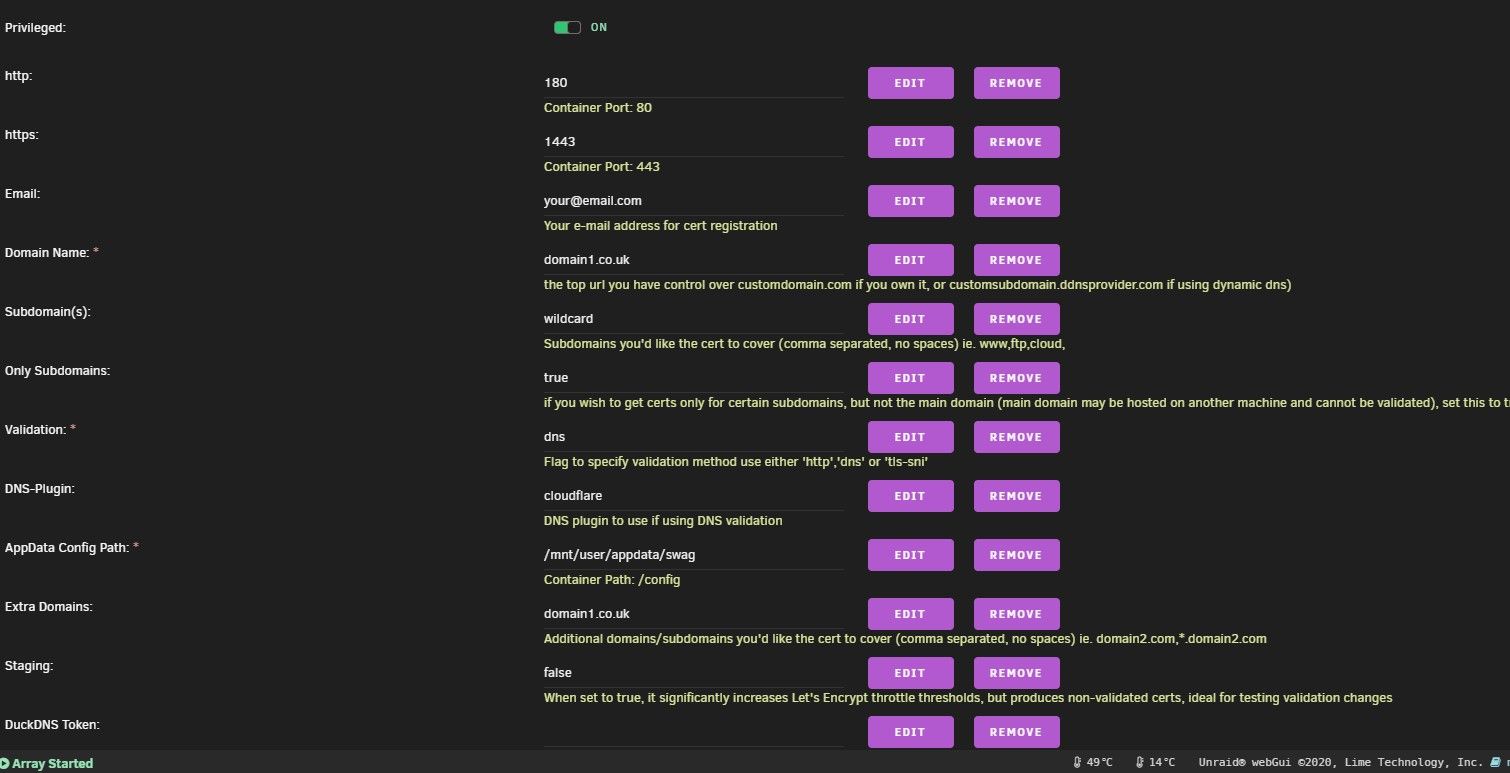
Right so now go to the "Apps" tab in unRAID and download SWAG. When the template is available we need to enter some details into the fields.
- Change "Network Type" to "dockernet"
- Enter you redirect port into the "https" tab which in this case will be 1443
- Enter your email address which you used with Cloudflare in to the "Email" field
- Enter your domain name into the "domain name" field, just the domain name nothing else!
- Enter "wildcard" into the "Subdomain" field as this will cover all your subdomains without having to renew your certificate.
- Change the validation to "dns"
- Change the "Validation" field to "cloudflare"
- Now hit "Apply"
- Go to each of the dockers that you've created subdomains for an change the "Network Type" to "dockernet"
Now we need to edit the clouflare.ini with some information. I find the easiest way is to use WinSCP on windows to edit anything required. Download it, install and connect to your unRAID system. Go to...
/mnt/user/appdata/swag/dns-conf/
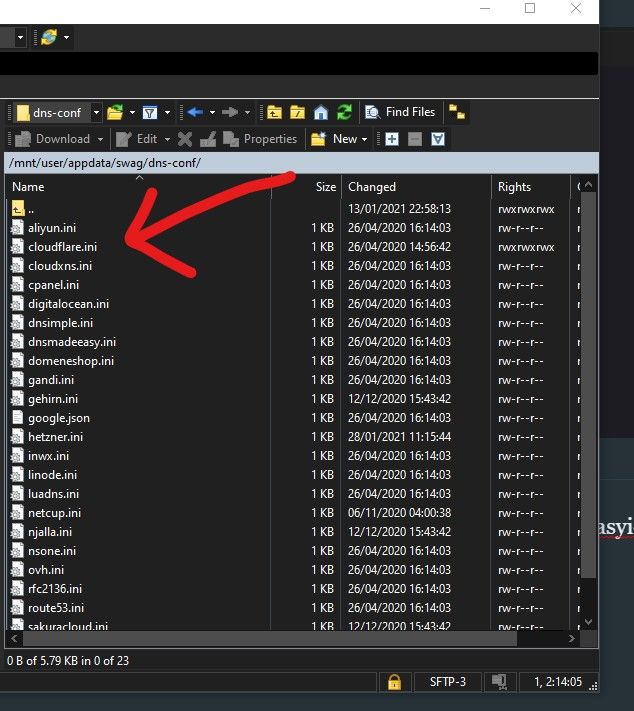
Edit the cloudflare.ini. WinSCP has a built in editor or you can use another text editor such as Notepad++ or even better Visual Studio Code. Paste into the Clouflare API you saved to the desktop earlier on in the tutorial into the appropriate section and then enter the email address you used to sign up with Cloudflare.
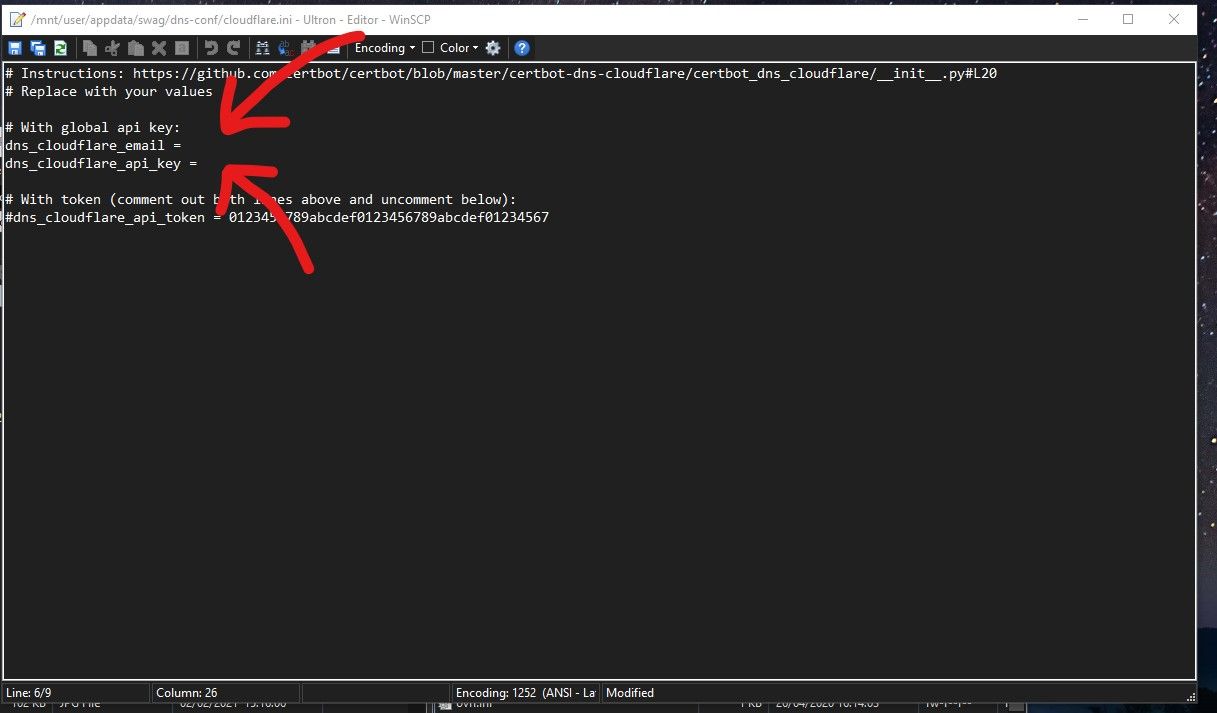
Make sure you hit the save icon!
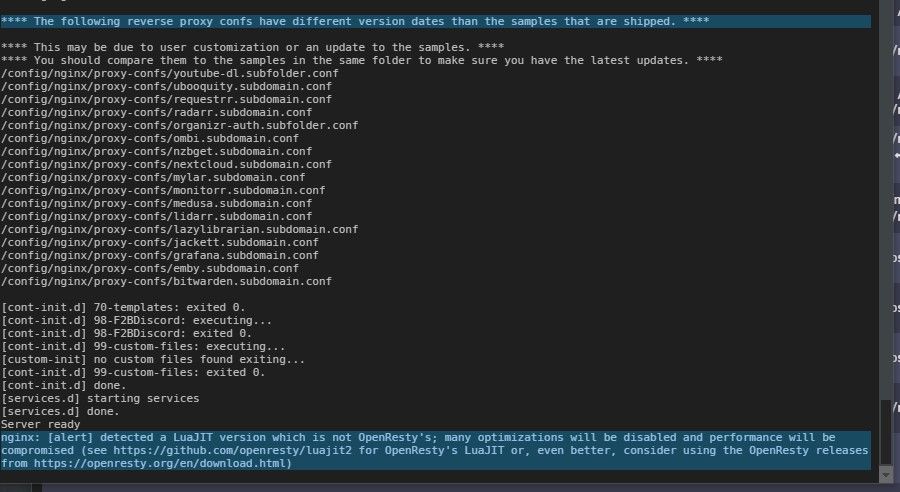
Restart the SWAG container. Check the SWAG log for any errors. When SWAG is ready it will state "Server Ready"
SWAG .conf files
As mentioned before SWAG comes with all kinds of pre-worked .conf files for various popular services, these can be found in...
/mnt/user/appdata/swag/nginx/proxy-confs
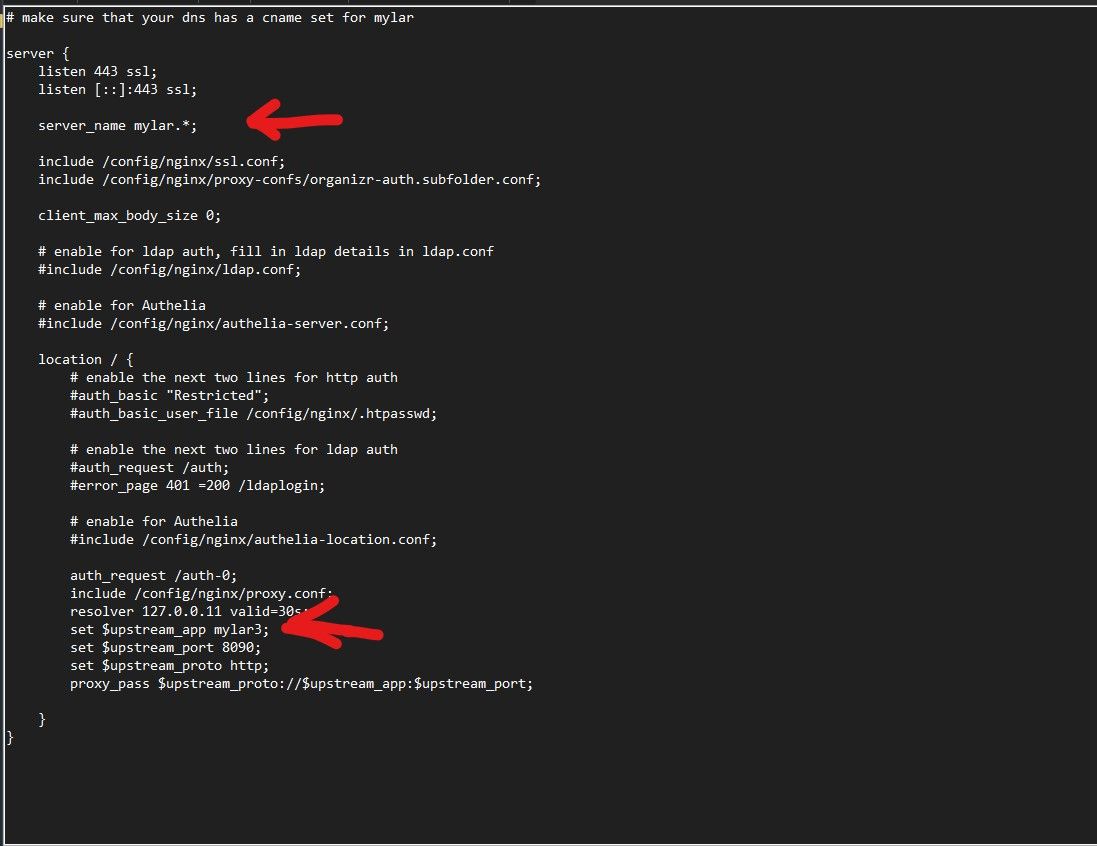
Using WinSCP again find the pre-worked .conf files that match your CNAMES/dockers and edit them to suit your setup, for example lets take Mylar3.
# make sure that your dns has a cname set for radarr and that your radarr   container is not using a base url

server {
listen 443 ssl;
listen [::]:443 ssl;

server_name mylar.*;

	include /config/nginx/ssl.conf;


client_max_body_size 0;

# enable for ldap auth, fill in ldap details in ldap.conf
#include /config/nginx/ldap.conf;

# enable for Authelia
#include /config/nginx/authelia-server.conf;

location / {
    # enable the next two lines for http auth
    #auth_basic "Restricted";
    #auth_basic_user_file /config/nginx/.htpasswd;

    # enable the next two lines for ldap auth
    #auth_request /auth;
    #error_page 401 =200 /ldaplogin;

    # enable for Authelia
    #include /config/nginx/authelia-location.conf;


    include /config/nginx/proxy.conf;
    resolver 127.0.0.11 valid=30s;
    set $upstream_app mylar3;
    set $upstream_port 7878;
    set $upstream_proto http;
    proxy_pass $upstream_proto://$upstream_app:$upstream_port;

}

location ~ (/radarr)?/api {
auth_request off;
resolver 127.0.0.11 valid=30s;
    set $upstream_app mylar3;
    set $upstream_port 8090;
    set $upstream_proto http;
    proxy_pass $upstream_proto://$upstream_app:$upstream_port;

}
}
Make sure the "server_name" variable matches the CNAME you setup earlier on in Cloudflare. Check that the "$upstream_app" matches the docker name exactly, no special characters or upper case as it doesn't work. Save you new ".conf" file and make sure to REMOVE the ".sample" part otherwise it won't function. Note that the "$upstream_port" doesn't require editing as we're using internal docker DNS resolution.
Repeat this process for all the services you have. Most have pre-worked files ready to be edited. Restart SWAG and check the log again. If everything has went to plan there will not be any errors. You can now browser you new service at (for example) radarr.yourdomain.com
If your service exists on another server or dedicated IP then your .conf should look like this...
# make sure that your dns has a cname set for pihole and that your pihole container is not using a base url

server {
listen 443 ssl;
listen [::]:443 ssl;

server_name pihole.*;

	include /config/nginx/ssl.conf;


client_max_body_size 0;

# enable for ldap auth, fill in ldap details in ldap.conf
#include /config/nginx/ldap.conf;

# enable for Authelia
#include /config/nginx/authelia-server.conf;

location / {
    # enable the next two lines for http auth
    #auth_basic "Restricted";
    #auth_basic_user_file /config/nginx/.htpasswd;

    # enable the next two lines for ldap auth
    #auth_request /auth;
    #error_page 401 =200 /ldaplogin;

    # enable for Authelia
    #include /config/nginx/authelia-location.conf;


    include /config/nginx/proxy.conf;
     proxy_pass http://200.200.1.171:80/admin;

    proxy_hide_header X-Frame-Options;
}
}
In the next part we'll look at securing your services with Organizr and Fail2ban. Please note that your services are now exposed to the the WAN. You should at least and some sort of basic security implemented even if it's just the built in login type form. This isn't secure enough as these dockers only have basic protection available.
A post addressing the EXTRA DOMAINS variable here.
Any questions etc please see the comments section below.